Mechanical Repairs & Troubleshooting On Diesel Engines, School Buses and Related Operating Systems.
Sunday, January 29, 2006
AIR BRAKES-REPLACING SPRING BRAKE CHAMBERS
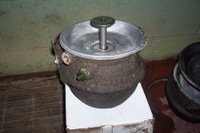
Spring brakes are used for parking and are applied when air is exhausted out of the spring brake system by way of the park brake control valve on the dash. The pushrod exerts spring force on the foundation brakes until air is re-applied to the spring brake chamber to release them. This is a simple system that works very well when properly maintained.
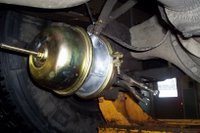
The spring brake pot must be CAGED when installing -for safety- with a caging bolt the spring enclosed is very powerful and deadly if it broke out of the spring brake pot. Years ago spring brake chamber diaphragms were replaceable having removeable clamps but now they are permanently enclosed so access is not allowed. I heard many stories of injuries and deaths occurring from spring brake pots letting go during servicing.
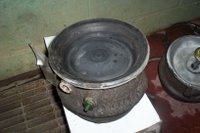
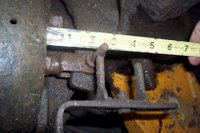
The picture on the left shows the service side diaphragm placed in the spring brake chamber and ready for installation. There are two seperate chambers in the spring brake pot, the service side[receives normal brake application air pressure from the foot valve] and spring brake side. The service side has a removeable clamp so replacement is possible, there is no danger removing this clamp but CAGING the spring is important! the caging bolt is attached to the side of the chamber assembly.
Before Removal:
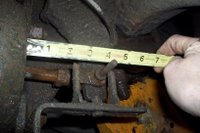
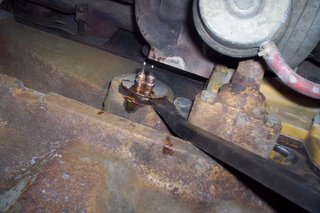
I usually clamp the pushrod with brakes applied using vise grips[middle picture] so the pushrod[operates the slack adjuster] stays fully extended outside the service brake chamber and out of the way[far right picture]I also use a schraeder fitting and air chuck to air the spring chamber to retract the spring brake push rod and install the caging bolt, instead of having to manually tighten the caging bolt. Once the spring brake is CAGED and lines removed the clamp on the service side chamber can be removed and replaced along with a new diaphragm. Perform a full application using a helper and check for leaks.
When To Replace Spring Brake Pots:
Besides the obvious failures like broken springs, diaphragms leaking and spring brake not holding, there are other things you should look for: If you pull the rear plug from the spring brake pot the caging orifice on the back of the spring [where the caging bolt fits into] should be centered in the pot, if it has kicked to the side then replacement is recommended. Our shop usually change spring brake pots every 5 years as a preventive maintenance measure.
Operators are trained to perform a Tug Test: Springs on, transmission in gear, hit the throttle really quick[on and off/1000 rpm] to test the spring brake hold back. Of course the brake adjustment is relative to spring brake performance.
Friday, January 27, 2006
INTERNATIONAL 466E DIESEL ENGINE..REPLACING RADIATOR
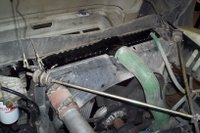
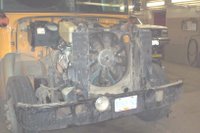
This Thomas school bus is a 1998 conventional with a DT 466E INTERNATIONAL DIESEL ENGINE. The radiator core was seeping coolant near the bottom tank, the core itself did not look too healthy so replacement was the only option.
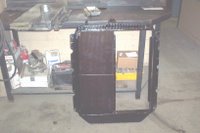
The hood has two hinge pins and wiring harness so it can be easily removed. The air shutters, lines and hoses are next while the coolant is being drained. The radiator as you can see is half the distance across to allow the air charge cooler to be fitted. Complete removal is easily done since all the components are easily accessable and not too heavy. A re-core was the only solution so there is no patch job to worry about and less chance of a service call. This bus runs 45 miles out of town on backroads, a thorough repair is essential.
Wednesday, January 25, 2006
CAT 3116 DIESEL ENGINE POWER LOSS TIP
One area that a lot of technicians don't check out on a low powered diesel is the charge air system. Any leaks and loss of turbocharger boost will limit engine power.
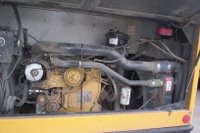
Besides checking clamps and hoses the AFTERCOOLER should be pressure tested. It's located in front of the radiator[picture shows upper piping that runs from the turbocharger to the AFTERCOOLER inlet] Our fleet has had numerous AFTERCOOLER failures so we finally ran a campaign repairing or replacing them.
Why cool the air to the engine inlet system? Because once the air is cooled it becomes more dense allowing a higher volume of air to enter the system increasing efficiency.
How To Test The Aftercooler:
Plug both ends and run 18- 20 p.s.i of regulated air pressure, check leaks with soapy water[We made plugs out of exhaust piping]. The aftercooler is made of aluminum and does not stand up to road salt and vibration. If you're stuck and need a quick fix[Patch Job] JB WELD will work temporarily. New AFTERCOOLERS are expensive around $1500 Canadian, we found a repair shop in Alberta that can re-core our units for half the cost.
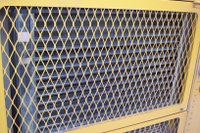
In front of our school bus aftercoolers are shutters controlled by coolant temperature. In between the shutters and aftercooler is a steering cooler. All these are transversely mounted so a healthy cooling system is very important. The transmission cooling lines run through the radiator bottom tank.
Thursday, January 19, 2006
CUMMINS {8.3 Litre} DIESEL ENGINE REMOVAL
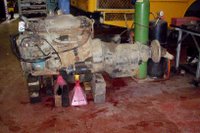
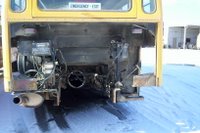
This bus has done it's time and we removed the engine and transmission to be re-used. The Engine has 200,000 km[120,000 miles] and the trans. has 20,000 km[12,000 miles]. There is a lot of life left on these components so it was decided to salvage all the parts we could off this bus and give away the shell to a local auto
wrecker. Usually retired buses are sent to the auction but in this case we needed the transmission for another unit whose trans. failed. Sending out transmissions {Model MT-643} for rebuild usually costs between four and five thousand dollars. The savings here are much greater than what we would have received from an auction sale.
Wednesday, January 18, 2006
ALLISON MD 3060 ELECTRONIC TRANSMISSION
Corrosion found in Vehicle Interface Module
The Vehicle Interface Module or VIM is a self contained pre-wired control box that simplifies the connections between the Electronic Control Unit [ECU] and the vehicle electrical system.
The operator experienced a high transmission temperature with no high idle and exhaust brake. The fault codes indicated a power interruption between the battery and ECU.
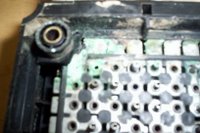
The VIM {pictured above} showed signs of corrosion at the connector and inside the unit, the VIM must be replaced.
Corrosion inside the VIM
This unit is located along the frame above the front axle. Freightliner {Now the Thomas Bus dealer} knows about this problem and is making improvements. MD 3060 transmissions do not like any kind of moisture since the components are electronic.
Sunday, January 15, 2006
AUTOMATIC SLACK ADJUSTERS
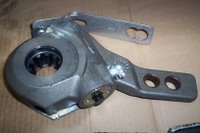
Automatic slack adjusters keep a constant clearance between your brake linings and brake drum, approxamately 25 thousands of an inch. The push rod travel stays at one and a half inches when the slack adjusters are working properly.
They can be adjusted manually and by the operator: by performing a full brake application[the air pressure must be over 90 p.si.] with brakes hot. This will assure proper adjustment, the slack adjuster automatically ratchets to take up any slack in the brake push rod travel. These slack adjusters [manufactured by HALDEX]are very reliable but do wear out causing no auto adjustment which will be obvious during a brake check.
During a service we check the push rod travel on a regular basis, every 3000 km. [1800 miles]
The push rod travel must not exceed 2 inches. For a fleet operation auto slacks are the way to go since continually adjusting air brakes can take a lot of man hours.
REPLACING THE BLOCK HEATER IN A CAT 3116 DIESEL ENGINE
The 3116 diesel engine has a convenient coolant drain plug at the rear of the block on the same side as the engine[1500 Watt] block heater.
All you have to do is pry out the block heater with a bar, sometimes it is necessary to clamp on to the heater with vise grips and twist it side to side to free up the o-ring from the block. Clean the block bore and install the block heater at the twelve o'clock position. Torque retainer bolt 20 to 25 in. lbs.
Wednesday, January 11, 2006
QUICK TIRE CHAINS
Here is a set of tire chains you are going to like! Four individual chains that can be easily slipped through the wheel, They are made out of regular chain, the elongated links[side chain from existing set of tire chains] make it easier to hook up with a bit of slack so they can be looped through the wheel holes one at a time [except where the tire stem is located!]
Once all four chains are hooked up run a rubber strap[bungie] through them all and take out any slack. One link is cut and bent into a 'C' shape and hooked up to a corresponding link on the same chain. It's quick and easy!
Cummins Diesel Engine Replacing Fan Drive Hydraulic Motor
Leaking input shaft seal
The fan drive [Made by DANFOSS} on a Thomas school bus is a hydraulic motor run by a control module that reads engine temperature. The fan assembly is tranversely mounted. One advantage of having a hydraulically actuated drive is there are no belts.
The Cummins diesel in this application is an ISC 8.3 model. The power steering oil used is 10w30, once drained disconnect all hydraulic hoses. The fan blade must be removed and rested against the radiator.
Once the motor is removed the fan hub must be removed using a suitable puller, the motor shaft is tapered.
DID YOU KNOW? The difference between a hydraulic motor and a hydraulic pump?
A hydraulic pump{steering pump} supplies oil flow driven off a diesel engine while a hydraulic motor operates a device {in this case a Diesel Engine cooling fan} and is driven by the hydraulic pump.
Once parts are exchanged the reassembly is straight forward with a little bit of manuevering. Add oil and change steering filters if required. Perform running checks and your are done.
Subscribe to:
Posts
(
Atom
)