Delco Remy Starters can be serviced and repaired very easily as you will soon see. For a lot of today's shops the time it takes to disassemble and service/repair a starter isn't economical.
The customer wants to get his vehicle going and gone so when you add up the shop rate plus down time it's cheaper [most of the time] to install a remanufactured starter.
But, a lot of starter defects are very minor like water and dirt, worn brushes or a defective solenoid.
Since my job is to save money the way to go is Preventive Maintenance considering we have 70 School Buses in our fleet. We usually service our starters once a year to prevent breakdowns. The following is a step by step procedure our shop follows to check over a Delco Remy 37mt Starter.
This starter model is used in our DT 466 and Cat 3116 Diesel engines.
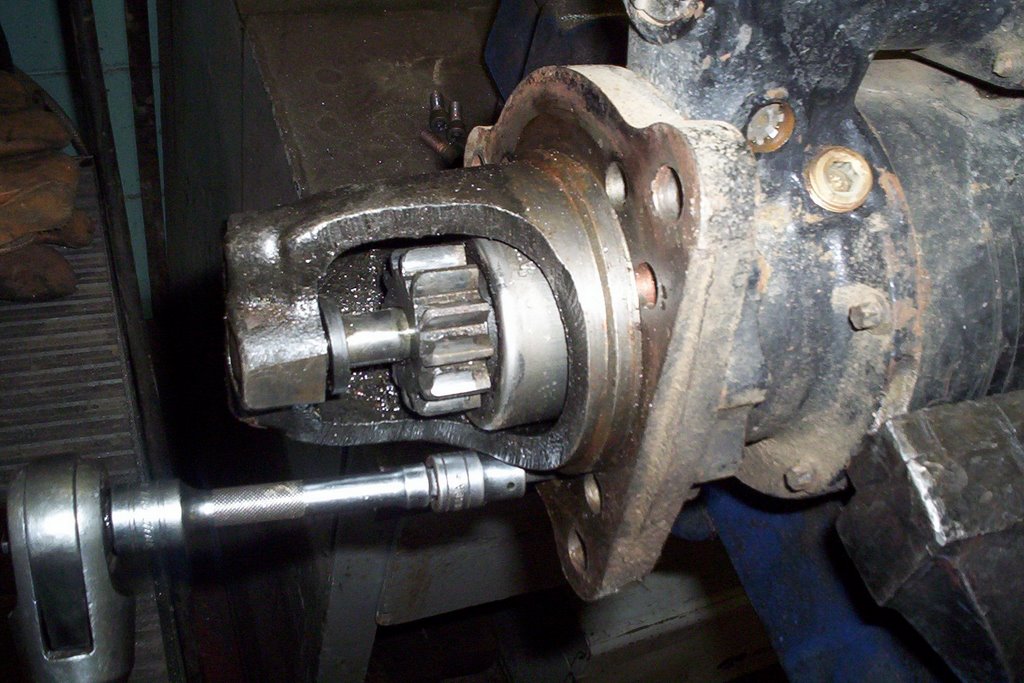 Remove the 6 torx head bolts holding the drive gear housing, use a T 40 Torx male socket.
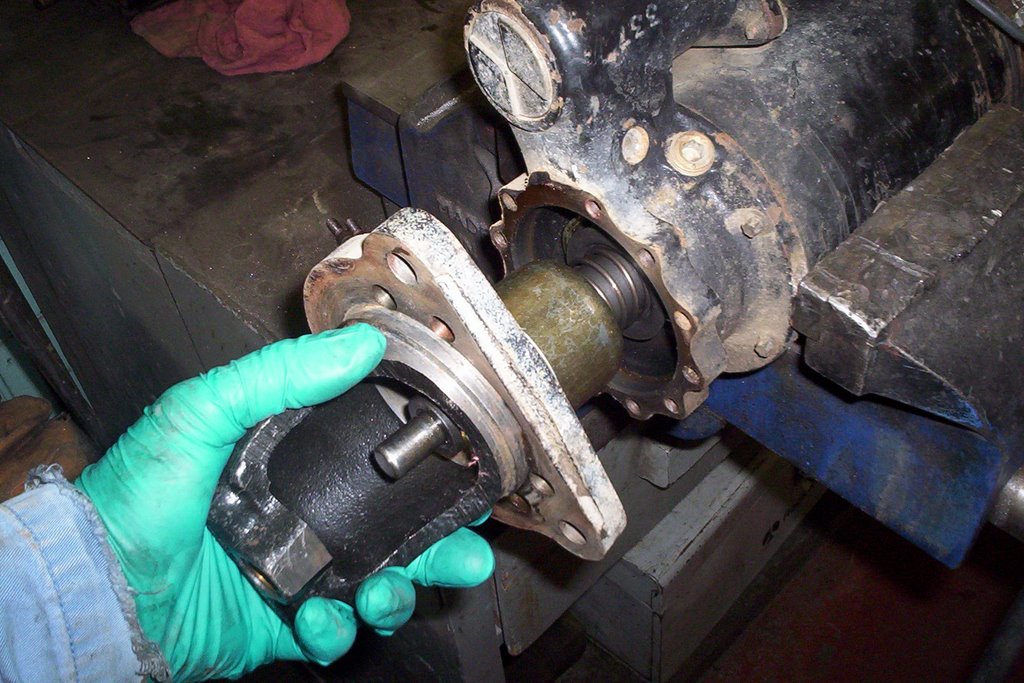 Remove the nose housing which is secured by an o-ring to prevent water and other contaminants to enter housing.
 Remove the expandable lock ring and lock washer. The lock washer fits over top of the ring with a chamfered shoulder that keeps the ring in place.
 Remove the backside housing using an E8 external socket. The ground stud stays with brush holder after removing 1/2 inch nut.
 Remove the 2 Positive brush fastener screws with a 1/4 inch socket. There are 2 positive brushes and 2 negative brushes, the positive brushes are wired into the motor windings.
 An easy way to suspend the brushes is to lock them in place using the retainer spring. Pry each brush upwards until the spring can apply side pressure.
 Remove brush holder assembly and check the condition of the brushes. We have a no flash contact cleaner that works great to clean up the brush holder.
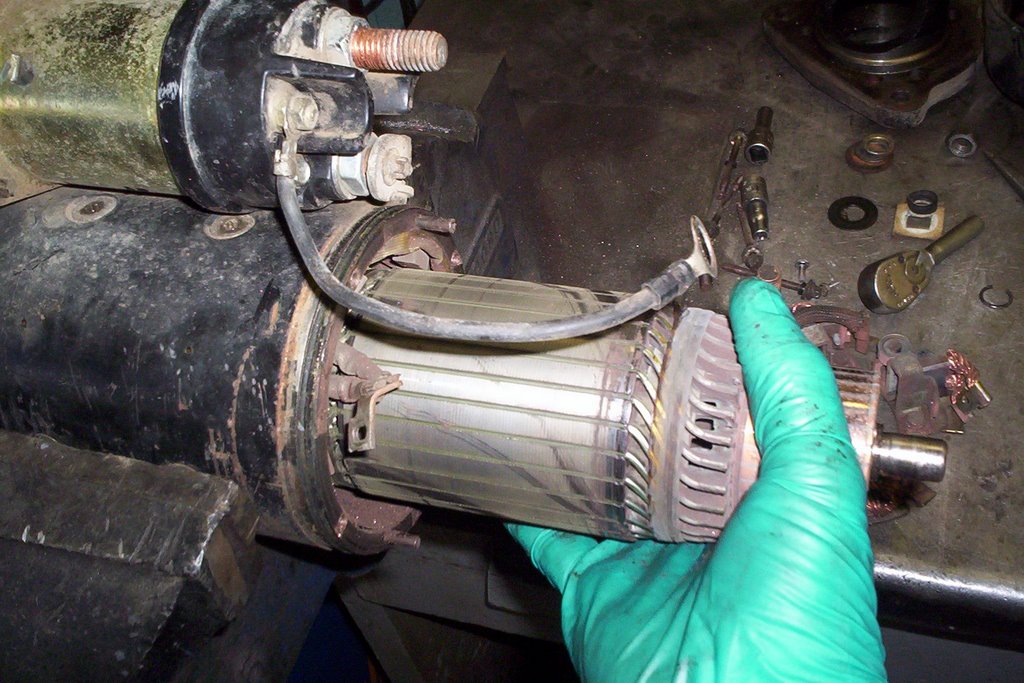 Slide armature out of the drive gear from the opposite end then carefully slide out of the main motor housing.
 Clean up starter armature in the lathe and follow up with sand paper for a nice finish. Just skim the surface when machining. Note: emery cloth is Ok to use but just blow off the armature after sanding and make sure the seperators between the commutator bars are clean.
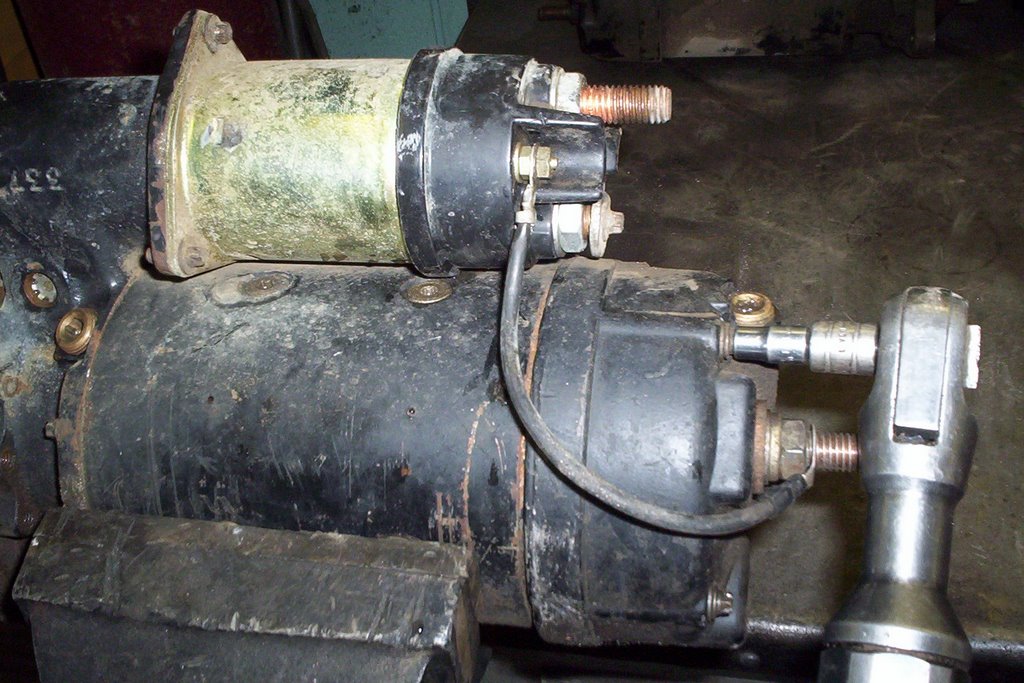
 Check solenoid for severe burn marks on contacts. The 2 threaded brass contact bolts can be turned 180 degrees to utilize unused side of contact surface. Check contact plate for pitting and clean up with emery cloth or replace.
These small parts are very affordable to replace, but like I said at the beginning of this post labor time is much longer than straight replacement of the starter.
Now that you know how to disassemble this starter you can easily put it back together. Once reassembled be sure to bench test the starter just for insurance that nothing has been overlooked.
Now you have yourself a Rebuilt Starter.
4 comments :
thanks for the info. doing great job,,keep up the good work!.....E.S.
thanks john nice to see
Your site has contribute to my success at work. Thanks John
I'm glad you guys found this info. useful.
Post a Comment