Showing posts with label mechanic troubleshooting. Show all posts

Saturday, September 29, 2012

Mechanic Troubleshooting Tales & A Blast From The Past.

When I was a 2nd year apprentice Mechanic in the late 70s I left the mining world and got a job up north at a busy truck shop, the oil patch was booming and Mechanic jobs were easy to find (even for rookies like me). The shop rate was $27/HR and I was pulling in $10/HR. If there was one mechanical problem I resisted (no pun intended)  the most it was electrical faults.

I'll never forget a White Western Star that came in and it had positive ground, you had to reverse your train of thought when it came to thinking through the circuitry. Anyways, back then series parallel switches were very common (12 volts running voltage and 24 volts cranking voltage). You just had to remember how the wiring went back together while the customer was standing there looking at his watch.

Through all that experience up to now and hundreds of shorts, no starts and charging system problems I've come to one conclusion.

Keep it simple and don't over-think the problem. If wiring continuity is disturbed with resistance, short or open circuit you're going to have trouble.  

SIDEBAR: If you ever have one or more circuits either not working or operating sporadically with relays or solenoids clicking on and off, there is a very good chance you have the blue stuff (corrosion) making a home in the connector or inside a module. It's happened to our equipment many times. The environment will take down anything that exposes itself!

If you look at an electrical system and think too broad you'll lose yourself. Think of the fault and the circuit, nothing else. A human friendly wiring diagram is most essential!


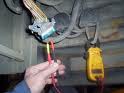
Here is a perfect example of a wire that had rubbed through the insulation. Oxygen goes to work fast on this exposure. Luckily this problem was obvious to the human eye and not nestled inside a connector or module.  One other method we use is grab the wiring harness while the fault is active and shake the hell out of it. Sometimes this works to fish out a problem. A short might all of a sudden quit or an open circuit might reconnect while you're at a certain point at the harness or at a connection point.


As Mechanics we can learn and adapt as we go through our training and experiences. Get your hands dirty and you'll get more tuned into any kind of mechanical problem.

 Did you find this information useful?.....Please share this post.

Monday, May 09, 2011

STN Going Social With Mechanic & School Bus Industry News

School Transportion News has a new social network that covers everything imaginable in the school bus transportation industry. I especially enjoy the TechNet section which covers school bus repairs and new technology. This is a discussion group that anyone can join and participate in with questions and answers as well as comments.

With changing technology it's essential to keep in contact with other professionals in the field and share ideas and answers to challenges encountered on a regular basis.

Here's the link if you want to check it out.  I highly recommend this site for up to date knowledge and a free ticket to rub elbows with an experienced group of school bus mechanics willing to share their knowledge.
http://www.stnonline.com/social

Sunday, January 09, 2011

No Start Cummins Diesel Engine

Cummins Diesel Engine
Here are a few tips and checks you can make when your Cummins Diesel Engine will not start. This information pertains to mechanical injection diesel engines.

Don't feel insulted with some of these checks because the simplest steps have been overlooked many times.

The rule of thumb is Check The Simple Things First!

  1. When your Diesel engine cranks but will not start - No smoke from exhaust
  2. Is there fuel in the supply tank? Always check the source on your diesel engine
  3. Check electric or manual fuel shut-off.
  4. Is the air intake or exhaust plugged?
  5. Note: Remember, a diesel engine needs air and fuel to run
  6. Fuel filter plugged / seperator full of water?-drain as required.
  7. Your diesel engine injection pump not getting fuel or fuel is aerated. Check fuel flow or bleed fuel system.
  8. Check inlet restriction to fuel transfer pump
  9. Inspect lift pump operation. Remove outlet line and crank over engine
  10. Worn or malfunctioning injection pump
  11. Internal pump timing incorrect
  12. Engine camshaft out of time
My experience with diesel engines has taught me to start from the source and work my way to the injectors.

Check the filters to see if they are still full of fuel, if not you've got a diesel engine that has run out of fuel - a no brainer. I went on a service call once and found out that the operator had filled the tank with gasoline, anything can happen!

Otherwise you have an obvious failure that you have to sink your teeth into. Replace fuel filters if the mileage or hours are excessive.

Check fuel lines from the tank to the primary filter [Fuel/Water Seperator]
Tip: I use a remote fuel container and slip the suction line before or after the primary filter. If diesel engine performance improves you know you have to start checking for faults back to the tank.

This procedure bypasses the fuel tank and lines up to that point which tells you if the problem exists in those areas i.e. restriction or split/cracked fuel line or bad pick-up tube in the tank.

Pull output line off of the lift pump on the side of the block and crank engine over and check for fuel output.

Prime fuel system with primer pump and bleed the injection pump, once primed crack injection lines at the injection pump and observe for fuel output.

In most cases you will find a problem up to this point, if not check injection pump timing or check to see if the camshaft gear is actually driving the injection pump. These failures are not common at all.

I hope these tips help you troubleshoot your Cummins Diesel Engine.

Tuesday, November 30, 2010

Mechanic 12 Volt System Troubleshooting-Reverse Warning System Stuck On

Working on a fleet of buses has some amusing moments. Especially when 12 Volt systems and moisture come into play. Mechanics go to school to get the basics, then you need to use those basics and go much deeper. Experience indeed is the best teacher and mechanic information on symptoms and troubleshooting can be shared and recorded for the benefit of the entire shop and right here on this blog for future use.

Below is what I call a 'Mechanic's Special'

The driver complaint is the back up alarm and reverse lights come on all the time even in neutral. So the first thing to think about is what could possibly cause this to happen without touching the controls. With the key on we have full operation of the back up warning system. The HDX Thomas pusher we are working on has the VIM (vehicle interface module) mounted above the steering axle (Lots of snow and ice). This is the first place to check since the interface module receives the reverse signal from the Trans ECU after the driver selects reverse.   CLICK ON PICTURE TO ENLARGE.
The VIM has relays and fuses (BELOW) to control the circuits on the chassis side of the bus including the high idle, neutral start and reverse warning. Luckily once we pulled off the lid to the VIM we heard a buzzing noise. This is not normal and is a mechanic troubleshooting red flag, you want to look for abnormal mechanical situations.

After opening the VIM up the problem was obvious. The corrosion was making a circuit from battery to the reverse warning system. Moisture, oxygen and 12 Volt electrical circuits love each other and create double trouble after uniting for a given period of time.
Here is my 'KEEP IT SIMPLE' drawing (BELOW) of the circuit in question. The operator chooses reverse, the transmission shifts and the reverse signal is fed to the Vehicle Interface Module to the reverse relay and 12 Volt power feeds the reverse alarm and lights.


Once you know how a circuit works it makes the problem solving much easier and common sense will prevail. This problem can happen anywhere so be prepared. Checking electrical problem circuits and components closest to the environment pays off more times than not. I hope you got something out of this Mechanic Information.

Please leave a comment below and share any 12 volt electrical experiences you've had in the past or just let me know you got something out of this info.

Tuesday, November 02, 2010

Allison 3060 Automatic Transmission Fault Codes

 Here are fault codes that a reader left on a comment wanting to know what they were. The Allison 3060 Automatic Transmission is all electronic with sensors, solenoids a wiring harness and the Transmission ECU (electronic control unit).

The codes can be retrieved by pushing the 2 arrows at the same time (key on) to retrieve the 4 digit fault codes. Another method is to use the Pro Link Hand Held Reader. To clear the codes after you've repaired the problem hold the mode button until you hear 2 beeps. This has to be done during code retrieving.

Code 2511 means the output speed sensor has a zero speed reading. Check the speed sensor and connection, the ohm reading should around 300 ohms. Also check the ECU connectors. Make sure they are tight,clean and undamaged. Check the fluid level and check wiring to the sensor has no opens, shorts between wires or shorts to ground.

Code 2522 is related to 2511.... 22 being a sub-code.

Code 2312 is the shift selector. Check ECU for connectors, shift selector connector, check selector for proper operation and check the wiring harness for opens, shorts between wires and shorts to ground.

We have had lots of wiring issues and repaired a lot of these problems by running a new coaxial wire from the sensor to the ECU. There seems to be some resistance in the wire that causes improper signals to be relayed to the ECU.

Another area there has been faults is the shift selector pad. You can get a kit for the selector which isn't hard to replace.

If it's hard to push the selector to get into gear that's the first sign of trouble and a new selector pad would fix the problem. Here are all the posts I have produced on the Allison 3060 transmission with troubleshooting and repairs included. Scroll down and you will see some more Mechanic Information on the output sensor circuit.
Got Questions ? Please a comment..

Monday, July 12, 2010

Top 3 Tips For Mechanic Troubleshooting

Many have succeeded at mechanic troubleshooting using their experience or step by step procedures following a troubleshooting guide while many others have not. The differences between good results and poor results can often be found in the way anyone carrying it out approaches the challenge.

Listed below are three guidelines to help you be on the list of winners, as an individual who succeeds.  

Follow these tips and you can be sure that you'll get better results!

First, you have to think about the turn of events before the trouble started. It will be most important that you get the story on the exact sequence of events and do this correctly. If you undertake mechanic troubleshooting in this manner, you can logically come up with a starting point and end up in a good position. In the event you neglect it or forget to pay attention, you'll probably be facing a frustrating process. If you undertake it wrong by not listening or using your common sense then you could have problems going down the right path from the beginning.

Second, you really need to check the source of the problem. This is essential, it's going to be crucial in determining whether you succeed or fail. It's necessary for these reasons:

1. Without the source i.e Fuel In The Tank / Healthy Batteries etc. you're screwed from the start. It's so simple but this step has been skipped many times....

2. Skip this step and you are headed for major complications, expense and embarassment.

3. It's by far the easiest step to take first, to reassure yourself that you're on the right track without second thoughts. Failing to perform mechanic troubleshooting in this way will almost certainly mean not getting to the problem quickly. Therefore you eventually fail at saving yourself time, vehicle downtime and money, depending on your situation.

Third, you have to remember to use the best resources available. Manuals and the right tools will give you a much better chance of succeeding. If you happen to neglect this or fail to do it, get ready to guess and take blind stabs at a system that you aren't thoroughly keen on.

Follow these three suggestions for mechanic troubleshooting and you'll more than likely succeed and enjoy all the rewards and benefits that taking the right troubleshooting steps would bring you. Ignore them and the prediction isn't good. It's up to you... follow them and come out ahead; ignore them and you simply will most likely not succeed. That's the brutal truth.....